'How to' sequence - square collet setting with Marcus Foley


Start cutting with your flat graver at this angle and don’t remove material from the top edge as it is already the correct size of your stone...
... continuing the first cuts...
...and do all 4 sides. Be very careful not to ‘bruise’ the inside top edge too much.
Start cutting back around the other way.
All 4 sides are now ‘stepped in’
Check with your stone that the sides are cut wide enough.
Come in with you graver straight down to clean out and sharpen the corners.
Look at the step you are cutting against the closer edge of the setting to clarify that you are cutting it square and parallel/horizontal.
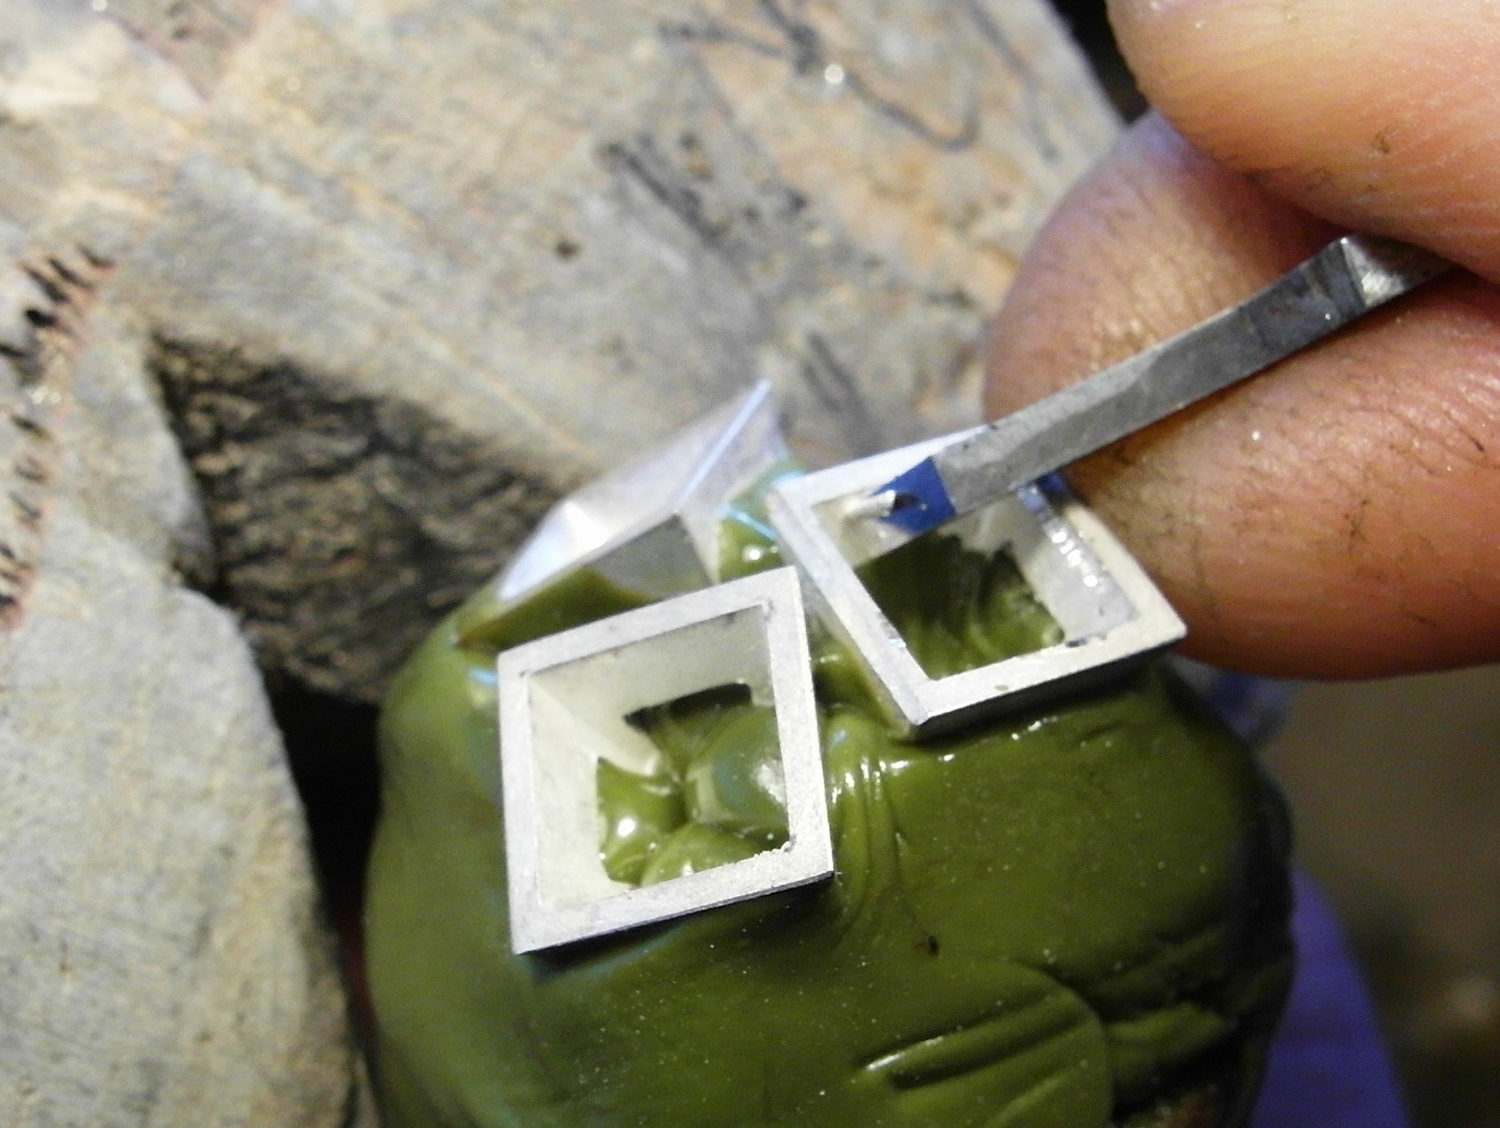
Look closely into your corners that they are clean and sharp. It is advisable to take a very fine small diamond file and carefully bevel (one stroke is enough) off the girdle corners of your stone to make it much easier to seat the stone and minimise the chance of chipping them.
Snip off the point on a tooth-pick and use blue tack to handle the stone, the remaining pointy end can be used to push and rock the stone to check its seat prior to setting. Also mark the stone and setting at this stage with a permanent marker to note the orientation of best fit.
Here the stone is fitting at a good depth (and not rocking too much) into the cut step of the collet.
Now start cutting the angled seat on all 4 sides in this direction, again being careful not to bruise the inside edge too much.
Cut the seat nice and cleanly into the corners and then cut back the other way on all 4 sides.
The finished seat cutting.
Check that the stone is fitting well and not rocking when you push and prod with the point of the toothpick.
The table of the stone should be at the same height as the top of the setting.
File a 45 degree bevel with a coarse barrette file and look closely so that you do not thin the top inside edge too much and check that the corners are of a consistent angle.
The setting is ready... you can see that I have lightly run the graver around the inside vertical face to clean up any 'bruising damage'.
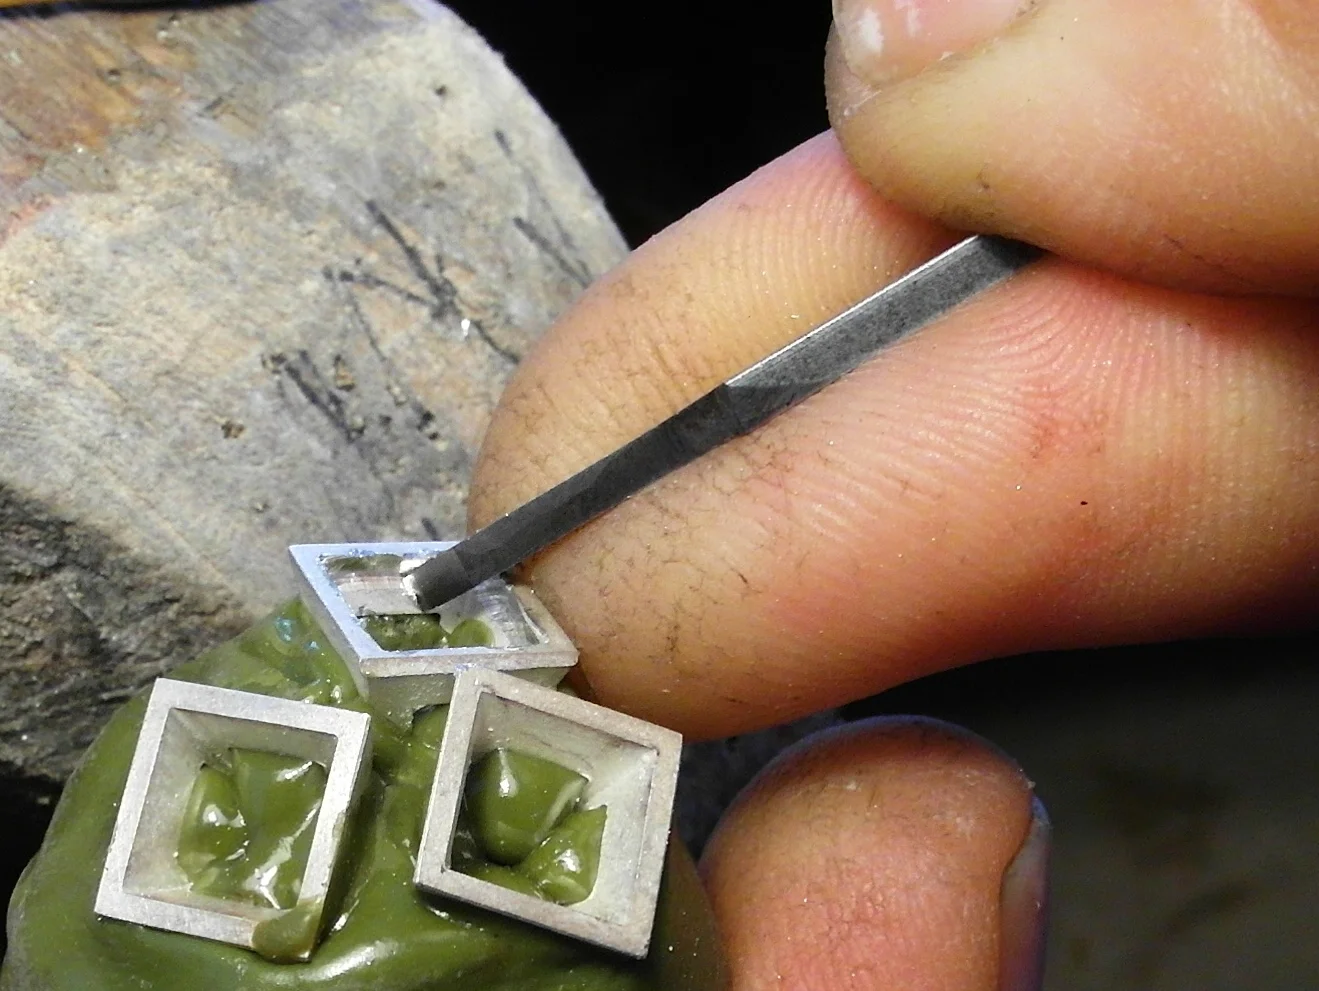
...to start setting the stone. Now, you can see that it is helpful to let a corner of your thumbnail to grow a little as you can use it to secure the stone when beginning the setting - you do not want it vibrating and bouncing around. Have the spring on the hammer hand piece adjusted fairly high to really move the metal down. Note the angle of ‘attack’ here and do all 4 corners in a 1,3,2,4 pattern, checking before every corner that the stone is still sitting ‘square & horizontal’.
Be cautious not to over-cook the setting by hammering too much on the bottom outside edge of the corner.
Again, in a 1,3,2,4 pattern do both sides of each corner, ensuring that the stone stays horizontal. At this stage it may still move or rock a bit.
Now hammer down the sides, angling the setting so that you are really looking between the metal and the stone and as even as possible move the metal towards the stone, note the finger underneath the setter is used to ensure no slipping.
Carefully work on all 4 sides with the hammer, but do not bring the metal all the way onto the stone. Adjust the hammer hand piece now, reduce the tension on the spring to make the action lighter for this closer work.
At this stage we have finished work with the hammer hand-piece.
Use a coarse barrette to refine the bezel surface...
...keeping the angles of all 4 bezels consistent by using the corner angles as a guide...
... as you can see here - the opposing corner angle facets line up with each other and should match those on the stone too.
Be careful not to file too much though and keep some thickness on.
Here, we start with the hand-setter. Again, start at the corner, note that the angle of attack is steeper. Push firmly and rock it side to side, looking always between the metal and the stone. Work around all corners 1,3,2,4 and then the sides. You may at this stage need to use the file once more, to thin and refine the setting bezel edge.
Finally with the hand setter you can come right in, very steeply making sure that the metal comes right down onto the stone, fully securing it.
Finished with the hand setter and the file for now...
... and now we use the flat graver once more. Make sure it is still sharp and cut the 'bright-cut' around the stone carefully...
...especially as you approach the corners, too much heft and you can accidentally cut right through, pretty much ruining the setting...
...carefully cutting back the other way, look to see the angles of the cuts are the same. Take your time and realise it takes a lot of practice to get it right.
Finished with both the graver and the file...
... now I love to use fine wet and dry paper glued (contact adhesive) and trimmed to an old barrette file for the final cleaning up . Start with 400 or 600 grit and finish with 800 or finer if you like. Be careful not to paper the stone of course!
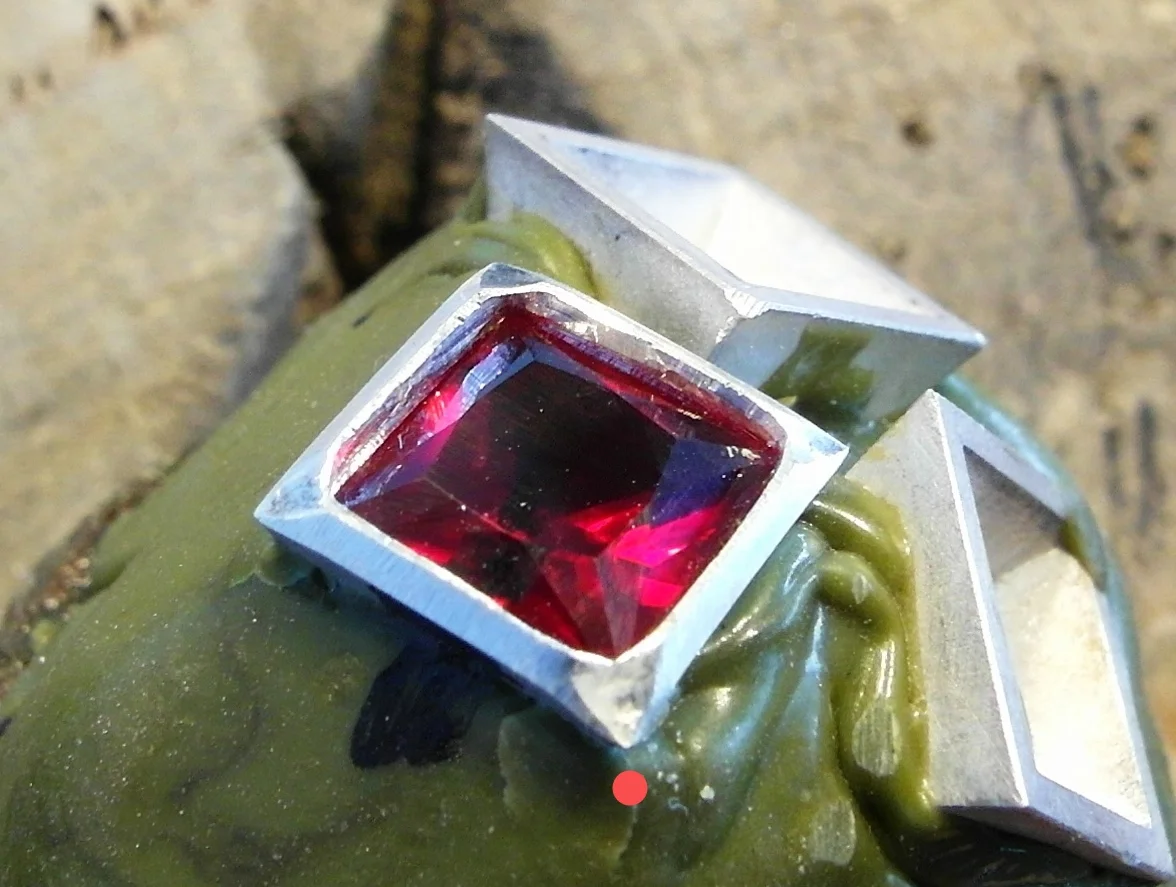
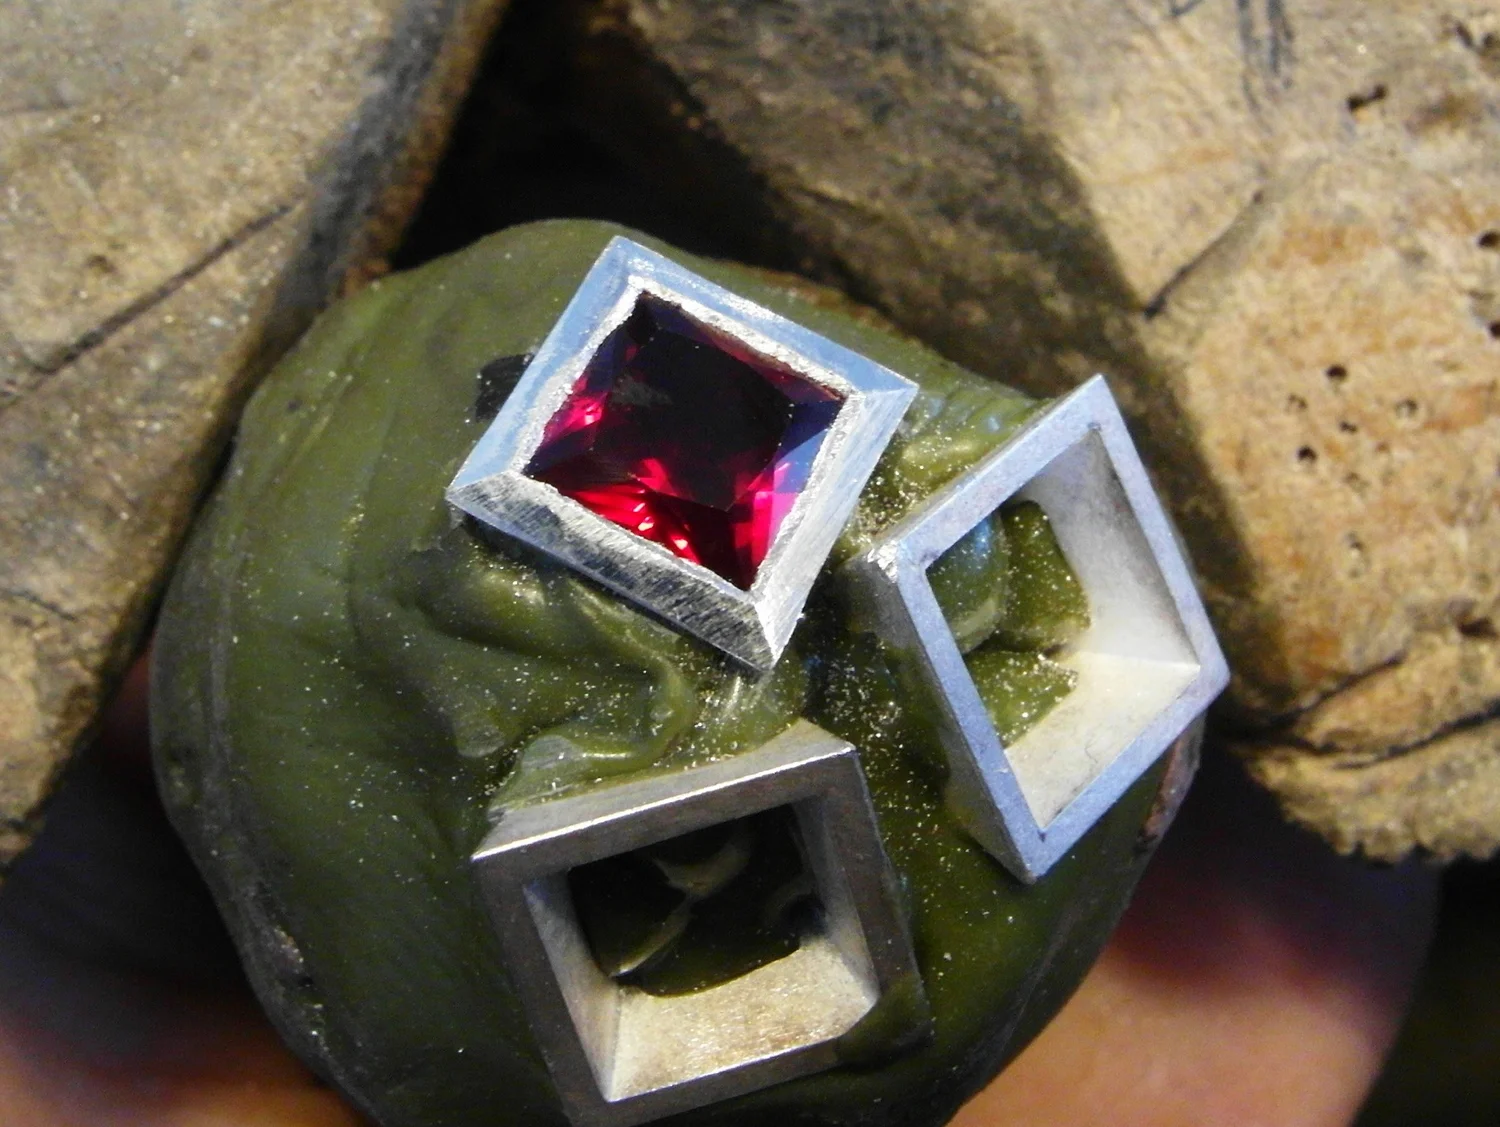
Here’s the finished setting...
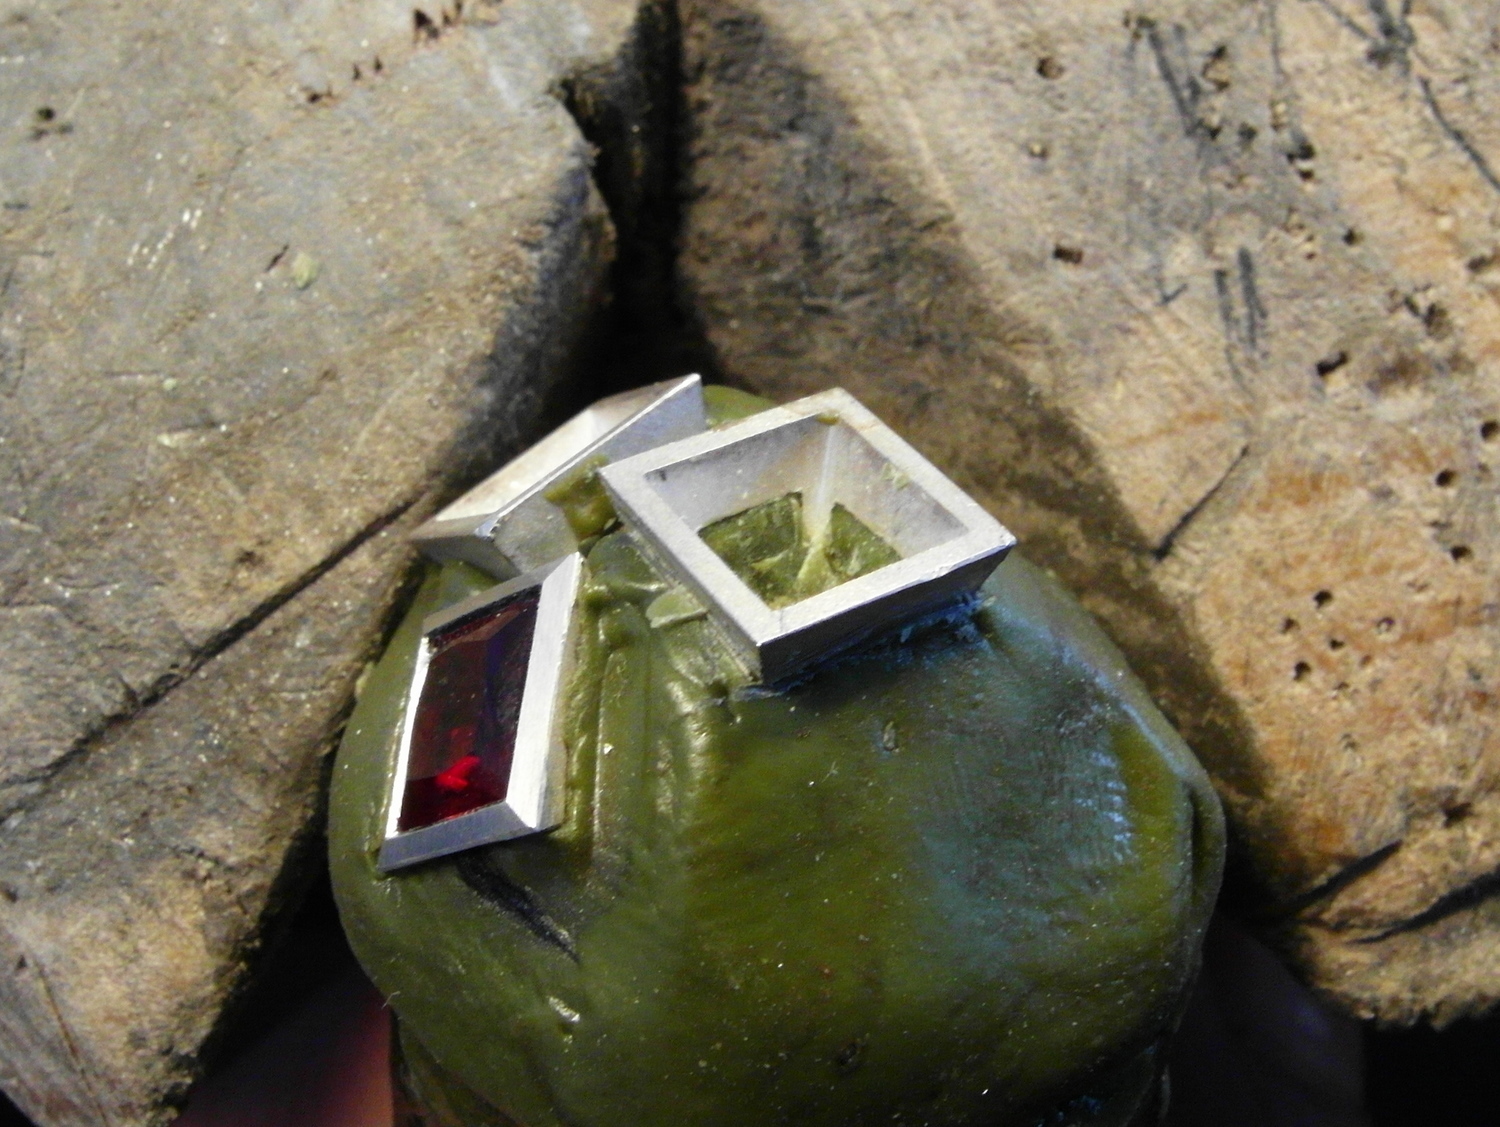
... and here again. Final polishing will take place after all 3 stones are set and out of the wax.
The wax has been heated and the piece turned around so that the next setting is square and ready to set.
You can use electrical tape to protect any previous work from slips or accidental filing.